Building a screened-in porch is more than just adding extra space to your home; it’s about creating a comfortable outdoor oasis free from bugs and harsh weather. With years of experience in construction and home improvement, I’ve seen firsthand how this addition can transform the way families enjoy their homes.
This project can seem overwhelming at first glance, but with the right guidance and tools, anyone can bring this dream to life.
In this article, we’ll break down everything you need to know about constructing your screened-in porch. From understanding costs and planning steps to selecting materials and handling maintenance, we’re here to provide expert advice every step of the way.
Interestingly, did you know that adding a screened-in porch can significantly increase your property value? Keep reading for all the details on how to complete this project.
Ready? Let’s get started!
Benefits of adding a screened-in porch
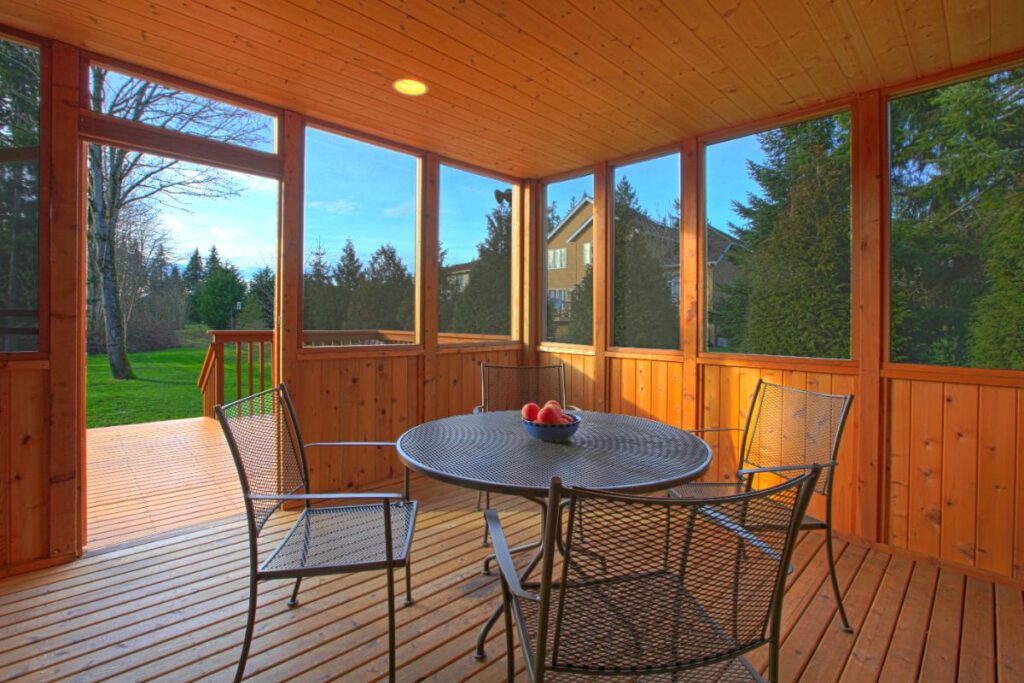
Adding a screened-in porch to your home offers the perfect blend of outdoor enjoyment and indoor comfort. It creates a cozy space where you can experience fresh air without the hassle of bugs or bad weather spoiling your relaxation time.
This addition becomes an ideal spot for dining, reading, or simply unwinding with nature as your backdrop.

Screened porches also enhance the value and appeal of your property. They provide extra living space that is both versatile and attractive, making it appealing to prospective buyers if you decide to sell.
Moreover, building a screened-in porch could help lower energy costs by offering additional shade during hot months, contributing positively to your home’s overall efficiency.
Planning and Cost
Before starting the construction, it’s crucial to carefully plan according to your preferences. Budgeting for materials and labor should be done meticulously, keeping in mind any unforeseen expenses.
Factors to consider before building
Before you start building your screened-in porch, think about the location and foundation. Choosing the right spot can affect how much sunlight your porch gets and if you’ll need additional lighting or cooling.
A solid foundation ensures your screened porch construction lasts for years. You also have to check local codes and permits; some areas require approval before construction begins.
Thinking about how you’ll use your porch is key. Will it be a cozy corner for reading or a space for entertaining guests? This decision impacts everything from size to furniture choices.
Plus, consider future maintenance needs to keep your screened-in area looking great season after season.
Average cost breakdown
The average cost to build a screened-in porch can vary widely, depending on factors like size, materials, and whether you opt for a DIY project or hire professionals. For a basic enclosed porch, expenses range from $2,000 to $2,800 for just the screening and framing.
If you’re thinking about adding extra features such as lighting or fans, or using high-end materials, the price can jump significantly – sometimes up to $25,000 or more for luxurious designs.
Getting an accurate estimate involves considering these various elements and deciding how they fit into your vision for building a screened-in porch. Next up is exploring the necessary tools and materials needed to bring your screen porch details to life.
Building a Screened-In Porch
Building a screened-in porch requires specific tools and materials. Follow step-by-step instructions for successful construction.
Necessary tools and materials
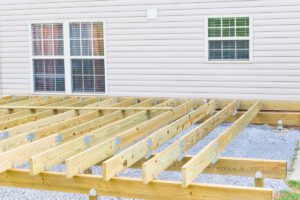
To build a screened-in porch, gather the necessary tools and materials. You’ll need basic carpentry tools such as a hammer, saw, drill, tape measure, level, and screwdriver. Additionally, ensure you have the required building materials including lumber for framing and decking, concrete for footings or piers (if needed), screening material like fiberglass or aluminum screens, fasteners such as nails and screws, and weather-resistant paint or stain to finish the porch.
Once you have all your tools and materials ready to go, you can start building your dream screened-in porch.
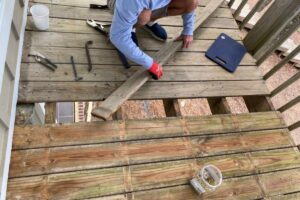
Step-by-step instructions
Gather all necessary tools and materials before beginning. Measure and mark the porch area, ensuring everything is square. Install the bottom plate, then attach the top plate to match.
Erect corner posts, spacing them evenly with a level line for accuracy. Secure horizontal studs between the corner posts followed by installing the door frames. Once in place, add rafters and ensure they are even across both sides of your porch.
At this point, apply screening material to each side of your new creation.
Adding Detachable Screens

Adding detachable screens to your screened-in porch offers flexibility and convenience. Easily switch between an open-air feel and insect-free comfort with the right materials and a straightforward attachment process.
Benefits
Adding a screened-in porch to your home provides a versatile outdoor space. You can enjoy the fresh air without dealing with pests, and it’s an ideal spot for entertaining or relaxing.
Here are some other advantages of getting a detachable screen:
● Seasonal Flexibility: With a detachable screen, you have the flexibility to enjoy your porch throughout the year. During warmer months, you can attach the screens to keep insects out while still enjoying the breeze. In colder seasons, you can remove the screens to allow more airflow or even replace them with transparent panels to create a greenhouse effect, extending the usability of your porch into the cooler months.
● Easy Maintenance: Detachable screens are typically easier to clean and maintain compared to permanent installations. You can easily remove the screens for thorough cleaning or repairs, ensuring that your porch always looks its best without much hassle.
● Customization Options: Detachable screens offer various customization options to suit your preferences and needs. You can choose from different screen materials, colors, and designs to complement your home’s aesthetic and create the ambiance you desire. Additionally, detachable screens can be easily replaced or upgraded if you decide to change the look of your porch in the future.
● Increased Property Value: Adding a detachable screen to your porch can enhance the value of your property. Potential homebuyers often appreciate the versatility and functionality that a screened-in porch provides, making your home more attractive to prospective buyers and potentially increasing its resale value.
● Energy Efficiency: Detachable screens can help improve the energy efficiency of your home by providing additional insulation. During hot summer months, the screens can help block out the sun’s heat, reducing the need for air conditioning and lowering energy costs. Similarly, in colder seasons, the screens can help trap heat, keeping your porch warmer and reducing the need for heating.
● Privacy: Detachable screens offer added privacy for your outdoor space. Whether you’re enjoying a family gathering, reading a book, or simply unwinding after a long day, the screens provide a barrier from prying eyes while still allowing you to enjoy the beauty of the outdoors.
Materials needed
You will need the following materials to add detachable screens to your porch: screen mesh, screen spline, a screen rolling tool, scissors or a utility knife, and a measuring tape.
These materials are essential for attaching screens and creating a comfortable and bug-free outdoor space. Moreover, they are easily available at hardware stores or online retailers.
Once you have gathered these materials, you can proceed with the installation process by following the step-by-step instructions provided.
How to attach screens
To attach screens to your porch, start by measuring the dimensions of each opening. Cut the screen material to fit and secure it using a staple gun or screen spline. Make sure it’s taut for a neat finish.
Trim off any excess material and add trim pieces for a polished look. Lastly, don’t forget to install door and window hardware if needed.
DIY vs Hiring Professionals
Considering DIY vs Hiring Porch Professionals is an important decision when building a screened-in porch. Read on to explore the pros and cons of each option.
Pros and cons of each option
If you choose to DIY your screened-in porch, you can save money and have more control over the project. You’ll also gain satisfaction from completing the task yourself and might learn new skills along the way.
However, keep in mind that it requires a significant time commitment, and mistakes could lead to additional costs. Hiring professional Deck and Porch builder can ensure high-quality workmanship with less hassle for you.
They can also provide advice on design and materials. On the downside, this option may cost more and limit your involvement in the project.
Tips for hiring a contractor
When considering hiring a contractor to build your screened-in porch, it’s essential to interview at least three different professionals. Research their credentials and ensure they are licensed and insured.
Ask for references from previous clients and visit completed projects if possible. Look for contractors who specialize in outdoor construction or have experience with similar projects, ensuring the best results for your enclosed porch within budget.
● Interview potential contractors.
● Research their credentials.
● Check for specialization in outdoor construction.
● Ask for client references.
Related article: 5 Reasons to Hire a Professional Deck Builder
Maintenance and Tips
Keep your porch in good condition, personalize it according to your needs, and prepare for different seasons. For more details on maintaining a screened-in porch, read on!
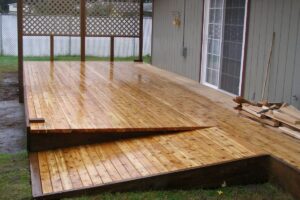
Keeping your screened-in porch in good condition
Regularly inspect and clean the screens to prevent debris buildup. Repair any tears or holes promptly with patch kits for lasting protection. Apply a fresh coat of weather-resistant paint or sealant as needed, ensuring your porch stays attractive and functional throughout the year.
Store furniture during harsh weather to prevent damage and prolong its lifespan. Keep the floor swept to avoid accumulating dirt and leaves, maintaining a welcoming environment for relaxation.
Consider adding plants or flowers in decorative pots to enhance the ambiance while also repelling insects naturally. Install ceiling fans for added comfort, especially during warmer months.
Ideas for personalizing your porch
When personalizing your porch, get creative with outdoor rugs, throw pillows, and hanging plants. Consider adding decorative lighting to create a cozy ambiance for evening gatherings.
Incorporate furniture that reflects your style and provides comfort for lounging or entertaining guests. Choose accents and decor that complement the overall theme of your home’s exterior.
To add a personal touch to your screened-in porch, consider installing custom-made window treatments or curtains that match the interior design of your home. Additionally, showcase your personality by displaying artwork or unique decorative pieces on the walls.
How to prepare for different seasons
As you make plans to personalize your porch, it’s important to consider the different seasons. Adapting your screened-in porch for various weather conditions is crucial in ensuring year-round enjoyment.
Prepare for each season by investing in outdoor-friendly furniture and accessories that can withstand different temperatures and humidity levels. Switch out cozy blankets and warm lighting for lightweight fabrics and cooling fans as summer approaches.
Come fall, stock up on cushions, throws, and a portable heater to stay comfortable during cooler evenings. For winter, consider adding insulated curtains or screens to keep warmth in while still enjoying the outdoors.
As spring arrives, embrace the fresh air with easy-to-clean surfaces and vibrant decor that welcomes the season of renewal. Cleaning your porch thoroughly before each new season will help maintain its beauty and functionality throughout the year.
Troubleshooting common issues
If you notice the screens are sagging or loose, tighten the screen frame screws to secure them in place. Inspect for tears or holes in the screens and patch any damage with a repair kit.
Address any water leaks promptly by checking for gaps in the porch framework and sealing them with caulk. If insects are finding their way inside, make sure all seams and openings are tightly sealed.
Finally, if your porch is experiencing excessive condensation, improve ventilation by adding fans or adjustable vents to regulate airflow.
Conclusion
After completing the necessary steps and considering the costs of building a screened-in porch, it’s time for you to enjoy your new space. Adding detachable screens brings versatility, allowing you to enjoy the outdoors while keeping bugs at bay.
Whether you DIY or hire professionals, maintaining your porch is vital for longevity. Personalize your outdoor haven all year round with thoughtful décor and seasonal preparations.